Sunday, November 4, 2012

Vintage Sheet Windfall

DSC_2108

First order of business - Gah!  No blog posts in over a month.  I hate when that happens, but life is busy - like, crazy busy.  So from now on; when I blog, awesome!  And if I don't blog, no apologies.  But if you really care to know what I'm up to, (or what I'm eating, or sewing, or thrifting, or what crazy things my kids are doing) then you should be following me on instagram - because I'm on there alll the time.  EmmmyLizzzy.  Follow me.

Anyways, a windfall has blown my way.  A windfall of vintage sheets that is.  The picture above is what I picked up in ONE DAY.  One estate sale and one thrift shop.  I hit it big.

DSC_2117

Brand new, in the package, never been opened vintage sheets - I've got em!

DSC_1982

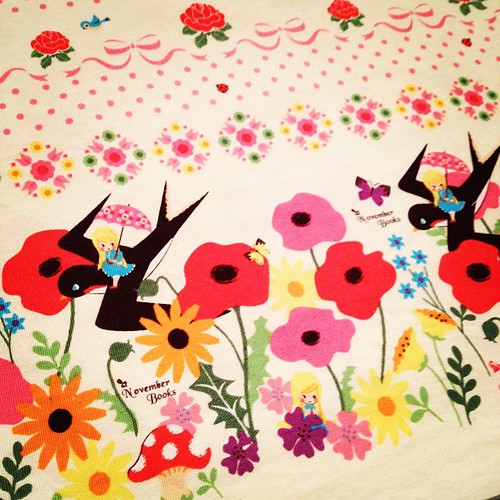
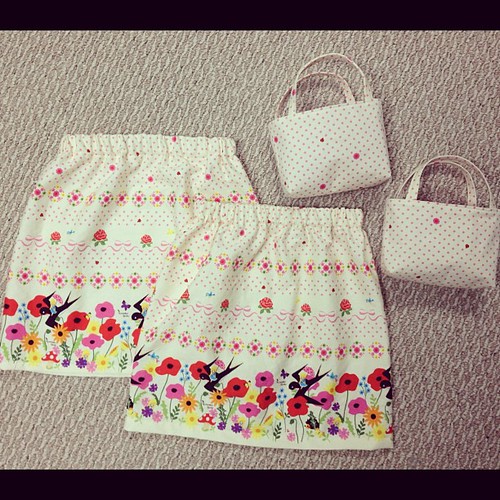
An entire sheet set of retro kitties?  Got that too!  Plus lots of other fun prints such as vintage trains, astronauts, clowns (cute or creepy - you decide!), and of course butterflies and tons of retro florals.

DSC_2114

These are taking over my house, so in order to get them outta here, use the coupon WINDFALL to take 20% off of your order through November 18th.  I've got most of the sheets listed, but I'll be adding some additional items such as vintage tea towels, some silk scarves, and other retro linens in the next few days.  I look forward to seeing what you make out of these beauties!

Tuesday, October 2, 2012

Secret sewing - revealed!

DSC_1836

I have been just dying to share this sweet little dress with you, but I had to wait until the pattern was officially released.  Well wait no more, dear friends!

DSC_1817

Shannon from luvinthemommyhood designed the most lovely pattern called the sweetheart dress, and I was lucky enough to test it out last month.

DSC_1818

Why is it called the sweetheart dress, you ask?

DSC_1823

Check out this completely unexpected and adorable heart cutout on the back! 

DSC_1834

The dress features a fitted and fully lined bodice - and believe it or not, this was my first time making a lined bodice!  Constructing the bodice was a piece of cake thanks to Shannon's pattern, and she even teaches you a couple of neat tricks to put everything together and hide all of your seams.


DSC_1850

How adorable is that lining fabric peeking through the sweetheart back?

DSC_1832

For the main dress fabric, I went with a print from Denyse Schmidt's Meadow Lark line from Joann's, and I lined the bodice with a print from Hello Pilgrim by Lizzyhouse.  The mini pom-pom trim was a complete last minute addition on my part, but I think it really puts a nice finishing touch on the dress since I used such a subdued print.

DSC_1844

Shannon also includes a tutorial for a hand-sewn button loop, which uses a fun method that I have never tried before - but I'll be sure to use it again in many projects.  I love when a pattern teaches me new things!

DSC_1837

Making this dress was a nice warm up to Elsie Marley's kids clothes week challenge that starts next week.  If you're not familiar with kcwc, it's a week where you set aside one hour each day to sew clothes for your kids.  The idea is that we all have the urge to sew clothes for our children, but we don't always give ourselves the time to do it.  Well this is the week, folks!  I probably won't have a blog post for everyday (it's not blog writing challenge week after all),  but I'll definitely be popping in with some project updates.  I look forward to seeing yours!

Monday, September 24, 2012

Still playing catch up

DSC_1656

Here's another quilt that I finished over the summer.  It has long been sent off to it's recipient, but the photos have been sitting here for forever, just waiting to be blogged about.

So this was another commissioned project - a wedding gift - and the only information that I was given was that a) the couple's apartment is very modern and mostly white, b) the couple really likes peacocks.

DSC_1670

Thankfully, feathers of all sorts seem to be a big trend right now, so it wasn't hard finding a modern peacock print.  I went with a couple of prints from Dear Stella's line, Lanikai, then threw in some coordinating solids.

I stayed true to my usual sewing method and didn't plan a darn thing.  I made some half square triangles, and haphazardly picked up whatever fabric was lying close to me and sewed some wonky corners onto 6" white squares.  Then I threw everything onto the design floor (seriously, I've been quilting for years and STILL haven't made a design wall.  Eesh!) and rearranged until I shouted, "Eureeka!"

DSC_1668

I backed it in a giant piece of the Dear Stella peacock fabric, and quilted it with random (of course!) straight lines.

DSC_1655

Word on the street is that the couple loved it!  Congratulations, you two!

Saturday, September 8, 2012

Sewing for school

IMG_3221

First day of school!  First day of school!  We have been talking up preschool all spring and summer long and it was wonderful to see my normally clingy child so bouncy with excitement on the first day.

IMG_3224

All we needed to send her on her way (aside from one of ten monthly tuition checks and a boatload of paperwork, meetings, orientation, etc.) was a couple of momma-made items to make her feel at home during those long three hours a day, four days a week that she is away from us.

Double layer skirt using Out to Sea @sarahjanestudios

First off - a brand new skirt to wear on the first day.  Fabric is from Sarah Jane's "Out to Sea" collection (narwhals!!!), and the double layer skirt was made using Dana's tutorial.

Almost done. How's yours coming @skirtastop ?

Next was the most quintessential of school items - a backpack.  I love love love Rae's Toddler Backpack pattern because it's super easy, holds it's shape really well - and it's toddler sized!  Most commercial backpacks are sized so that they practically swallow middle school students - let alone preschoolers.  This one is perfectly proportioned - but also comes with instructions on how to size it up for when your toddlers turn into big kids.

IMG_3219

Phoebe picked out the Contended Cats fabric from Tammis Keefe tribute collection by Michael Miller.  A quick search revealed that they have it on sale over yonder at Fabricworm right now!

DSC_1710

Truth be told, I don't actually give Phoebe total freedom when picking fabrics for her projects, because otherwise we'd end up with crazy psychedelic animals, or something that would leave a trail of glitter wherever she went.  So I end up picking about four or five fabrics that I think would appeal to her, but yet still stay within my realm of design sense, and let her pick from those.  Win win.

A happy first day of preschool!

And here's my silly girl at the end of her first day.  Super happy and excited to go back again tomorrow.  Her funniest comment about the day?  "I didn't cry or scream at all....  but lots of other kids did!"

Saturday, September 1, 2012

Maternity top to girl's maxi dress

Old maternity top into new dress for Phoebe

Phoebe has been growing like a weed this summer, and has somehow completely skipped over 3T and now fits comfortably into a 4T.  It's definitely time for me to sew her up a new batch of clothes since preschool is right around the corner - eeeks!

As I've stated in previous posts, I really love working with re-purposed clothing when sewing for children, since you can usually get more than enough fabric out of an adult garment, plus you get to take advantage of already finished seams, hems, cuffs.  Yay for being lazy!

So pardon the terrible photo, but here's a before picture of a maternity top that I definitely never plan to wear again....

Maternity Top-before

I didn't have a particular pattern in mind - just measured around Phoebe's chest and waist (21") and determined how long I wanted the dress to be (22" with an already finished hem!) and cut a rectangle to that size (I think I only ended up using the front panel from the original top, lol) and sewed the long ends together to form a tube.  

Then I cut a band that was about 5" wide by 20" long (you want the band a little shorter so it will stay tight around her chest and not fall down).  I sewed the bands short sides together, then folded it in half to a double thickness and basted the ends so it would stay put while attaching the skirt.

DSC_1245

Then it was as simple as sewing the skirt to the chest band.  Just be sure to stretch the band a little bit while sewing to fit it to the skirt.  I also hand sewed on an extra strap that ties around her neck to make sure it stays up while she's running around.

DSC_1239

I'll be back soon with lots more Phoebe clothes (I've got to round up some photoshoot bribes first) and some other back to school sewing projects! 

Friday, August 24, 2012

Ack! The cuteness!

Sewing with the cutest fabric ever.

This is a post about the Cutest.  Fabric.  Ever.

DSC_1579

A Thumbelina border print with flowers, birds, mushrooms, and ladybugs.  If there was a hedgehog or a fox hiding in there, this print would probably burst into flames from the cuteness.

DSC_1564

So of course, I had to make it into a skirt for Phoebe. 

DSC_1571

I bought a yard and cut it in half parallel to the selvedge (so it was 36" wide x 21" tall), sewed it in a circle, and added some elastic.  Something super simple that lets the fabric do all the talking.  There was still a bit of excess fabric from the half piece that I used, so I whipped up a cute little purse to match.

DSC_1574

And what makes this fabric even more amazing and awesome???!!!.....

 
......you've still got the other half of your fabric left to make into a matching skirt and purse for your daughter's bff!  More times that not, sewing your own clothes doesn't save money, but in this case - I got two skirts and two matching purses out of only one yard of fabric.  A high quality, Japanese cotton-linen blend, nonetheless. 

DSC_1555

Can it get any better?  Well heck yes, it can!  It's currently on sale in Brenda's shop!  I'm just trying to refrain from making one for myself....

Monday, August 20, 2012

Flying geese in grey and yellow

DSC_1455

Alrighty folks, since summer is winding down and Phoebe will be heading off to preschool in two weeks (!!!Yay!!!), I'm hoping to get up to date and share some projects that have been keeping me busy these past few months...

DSC_1463

One of my cousins is having her first baby next month (a girl - yay!), and is planning her nursery around the palette of grey and yellow.  I've always wanted to do a flying geese quilt - plus, my good friend Brenda just told me about this amazing ruler that makes absolutely perfect flying geese blocks - four at a time!  The Quilt in a Day Flying Geese rulers come in a large or a small size, and you have the option to make two different sizes with each ruler as well!  Even better?  I picked mine up at Joann's with a coupon.  This quilt was made with the large ruler and the finished block size is 4" x 8".

DSC_1471

The block layout - as well as fabric choices - were completely random.  I'm actually pretty terrible about planning out my quilts in advance.  I like to just move everything around for a couple of hours after all of the blocks are finished.  I quilted it in straight lines that change direction when they hit the middle of the quilt - following the diagonal; and I backed in it one of my favorite folksy flannel prints.  Soft and warm for a fall baby!

DSC_1457

My sister was my lovely quilt holder for this photoshoot, and as you can see, she took her job very seriously :)

DSC_1467

Thanks, Abby.

@cmibrown

And here's my cousin Jess opening the quilt.  I love you Jess, and can't wait to meet your precious little baby!

Monday, August 6, 2012

Washi dress x 3

DSC_1325

When it comes to garment sewing, I usually only make things for children.  It's not quite as intimidating, it takes very little fabric, and if you screw up - it usually looks pretty darn cute on them nonetheless.  Plus, I'll be honest, I absolutely hate my body after two kids (we weren't great friends before kids either), so why spend the time and money to make something for myself when the entire aspect of clothing, fit, and size really depresses me anyways?

DSC_1290

Enter the Washi Dress.  I was lucky enough to be at a sew-in a few months ago when Rae was working on a muslin for this pattern, and pretty much fell in love with it after she basically forced me to try it on.  The fit was fantastic, and it was super flattering - hiding all of my not so lovely areas.  Ever since that night, I had been practically stalking Rae to get my hands on this pattern, and my patience (or lack thereof) was finally rewarded when I got to test this pattern a few weeks ago.

DSC_1295

The pattern itself is incredibly easy to follow with lots of pictures and diagrams, and sews up quickly once you've made it a couple of times.  So much so, that I've already made three of them!  The floral version above was my first attempt at the tunic style (a bit too short for my liking - but I've been informed that the pattern has been adjusted to add some extra length anyways :)

DSC_1315

Oh yeah, another reason I have never been a fan of sewing clothes for myself?  I really hate being on the other side of the camera.  Blech.

This is version number two, made out of this lovely print from Tula Pink's new line, The Birds and the Bees.

Washidress

And then here is my latest washi, made out of Sketch in Turquoise.  I'm in LooooooooVE! And what you can't tell from any of these photos is that this dress has pockets!  Perfect for holding all of the acorns, rocks, and playmobil animals that Phoebe is always giving me. 

Momma & Penelope

So basically, this pattern rocks.  Many of my friends have tried the dress on as well, and it's amazing how great it looks on all of them - even with their different sizes and shapes!  It's super versatile and you can play with the length, neckline, and there's even an additional pattern piece to add sleeves - so you can sew a myriad of different versions. Buy it and make tons of dresses and tunics.  I plan on pretty much replacing my entire wardrobe with washi dresses!

***I heard from Rae that the Washi Dress pattern should be available this week!  Keep checking her site and I'll post a link once it's available!

Tuesday, July 3, 2012

A quilt for my sister

Beetle

My sister has been such a great sport in waiting over a year to get her wedding present - especially since she's been bugging me for a quilt since I started sewing forever ago.  It took me months to come up with a design, since I knew it had to be extra special for my favorite person in the whole world.

DSC_1220

After watching my friend Anna make Word Play blocks for a bee, I thought that some sort of written message would be perfect for my sister's quilt. 

DSC_1207

The text wasn't all that difficult to come up with, since the movie Rent is one of my go-to movies to watch while sewing (pretty much any musical, really).  The front is the first stanza from the song "I'll Cover You", and the back is the main phrase from the refrain.  If you haven't heard the song - listen to it!

DSC_1217

My sister is a huge Rent fan, plus I think that the lyrics are great for a wedding quilt.  I'm sure her husband won't appreciate the sentiment nearly as much (my husband basically replied with "gag"), but he'll have to put up with since he's married now! And I'm kind of giddy that the back says "I'll cover you" and it's a quilt, that ya know, you cover yourself with.  Teehee.

DSC_1186

Here's a better view of the text - I was getting some crazy shadows in all of the quilting this afternoon, so I took a much more flatly lit photo that shows off the letters better.  

I had such a blast making all 67 of these letters, and they went much more quickly than I thought they would.  The Word Play Quilts book gives a general diagram for piecing all of the letters, but they're sewn together very casually, by simply by joining small, medium, and large background strips and snipping off the extra with scissors.  No measuring!!


I think my favorite part of this quilt is the background fabric.  We had these exact sheets on our bed when we were little girls, and I snatched them up from my parent's linen closet a few years back.  I didn't quite have enough to make the entire quilt - the finished size is 60 x 90" - so I'd always keep my eyes open for more of this print when thrifting.  I think it took me 2 flat twin sheets and a couple pillowcases to complete this. 

Lyric Quilt

I love love love this quilt so darn much, and if it wasn't going to my wonderful sister, I would definitely keep it for myself.  She's flying in from Miami tonight (I haven't seen her in six months!), and I can't wait for her to open it.  I'd say that I hope she likes it - but I think I already know the answer.  Love you so much, Abby!